SandroFi
github repo: github.com/sandrofi84/sandrofi
technologies: Javascript, React, Gatsby, THREE.js (react-three-fiber), Sass
Intro
If you are reading this, chances are you have already seen a couple of pages of this project. For this project I have taken inspiration from movies and actors I love.
This is my first personal website and I wanted it to be simple and easy to navigate.
However, I also wanted to learn something new building it.
Animating The Canvas
Why not try some animation? I had been curious about 3D animation for a little while now, and had seen a couple of THREE.js tutorials. So I decided to give it a try.
If you have seen my previous projects, you might be under the impression that I like working with Gatsby. You would certainly be right. I think it’s a wonderful framework. That’s why I have used it in this project too, as I could leverage react-three-fiber, a React library that makes using THREE.js a breeze - when you get the hang of it - allowing you to declaratively build your canvas scene.
I decided I would limit the animation part to page transitions, as I wanted the site to be simple - as mentioned previously.
After a little playing with shapes and cameras, I decided to take advantage of THREE.js’ InstancedMesh object, which allows you to render thousands of 2D/3D objects in the canvas at the same time. It can manage ~10K-50K instances before it begins to lag - this varies depending on shapes, textures and so on. In this case, I render ~50K circles - as spheres it were too heavy on the GPU - at the most.
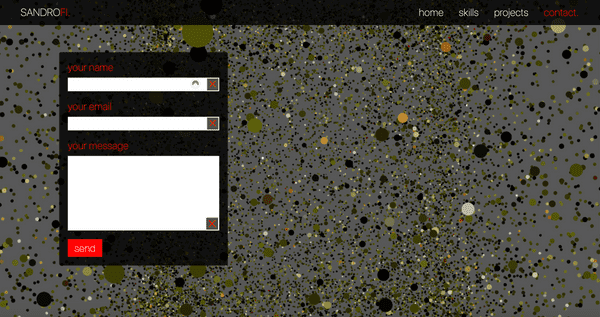
The idea was to have the canvas be the site’s background. The canvas would display a picture and, upon changing the page, the picture would explode in a swarm of particles and quickly recompose into a new picture - set as that page's background.
The animation logic is all written in one component called Pixels, which lives in the canvas.
Pixels
The first thing that Pixels does is, it loads the pictures that will be used as background. Then it gets the image data of each picture - the color of each pixel as RGB values and the transparency - and it maps it to an array that represents the background, so that each pixel-object in the array holds:
1 - The color and transparency values of the corresponding pixel in each picture.
2 - A set of coordinates that represent the pixel's original position in the picture.
3 - A set of randomised coordinates that the pixel will move to when the background "explodes."
Now, every animation cycle has two phases: expansion and contraction. Each animation cycle is regulated by a counter that counts down to zero - end of animation - and it is reset every time the user changes page.
In the expansion phase, each pixel will move towards their randomised coordinates. To do this, we iter through the pixel array in each animation frame - the default frame-rate is 60fps - slightly changing the position of each object instance, until they reach their destination.

At this point we invert direction, so the contraction phase begins. In this phase we do exactly what we did in the previous phase, except we also gradually change the color of each object instance to match the corresponding pixel in the new picture.
The animation stops when the new picture is recomposed - with a tiny offset to each pixel's position for a nicer look.

WebGL Support
Unfortunately, not all browsers support WebGL, especially older ones!
I was surprised to see that Safari on my Macbook Pro did not. So, what now?
I implemented an error boundary that wraps the Canvas and catches any errors that might occur and, if that is the case, it loads a fallback background and displays a message informing the user.

Conclusion
Learning how to use react-three-fiber and THREE.js was definitely the most challenging part of this project, and I feel like I have only scratched the surface...but I cannot wait to learn more about animation in my future projects!